
It is time for another detailed Asymptotia visit to the kitchen.
Not many days after I showed you that phase diagram for pastry making, Thanksgiving day showed up, and I found myself making an apple pie to take over to have with friends for dessert. Making a pie is a very fulfilling kitchen endeavour that is remarkably simple at the core. The bonus is that with a bit of practice the results are often delightful. Let me show you what I mean.
 The summary: You do various “processes” to move around the phase diagam, as with any phase diagram in physics. A phase diagram depicts the various states your working substance can end up in as a result of changing the conditions. Like H2O being able to be ice, steam, water, depending upon things like temperature and pressure. In physics, doing various processes to change your temperature and pressure might involve pushing on pistons, adding energy in the form of heat by applying flames with a bunsen burner, etc.
Here, we will be doing processes relevant to the kitchen. The aim is to find the right path across the amusing phase diagram above (click for larger; origin: Lab Lemming; finding the wrong path is not good since you end up with inedible junk… most paths are irreversible). Anyway, find the right path …and soon after you get to eat something like this:
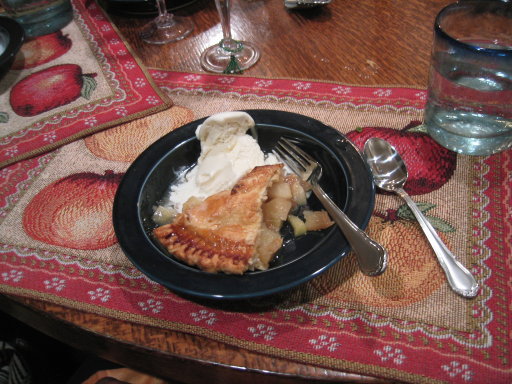
Motivated? Now for the details:
First, assemble your ingredients for the pastry. Don’t be shocked by the appearance of lard here. It is vegetable shortening – yes, fat, and it is fine. If you’re paranoid about a bit of fat, you should not be eating pies. In fact, don’t eat out in any fine restaurant, for you will be sure to find the kitchens stacked full of all sorts of fats, from piles of butter onwards. I’m a traditionalist in food -a little bit of everything does you no harm is my philosophy. So you’re looking in the wrong place if you’re worried about lard and butter.
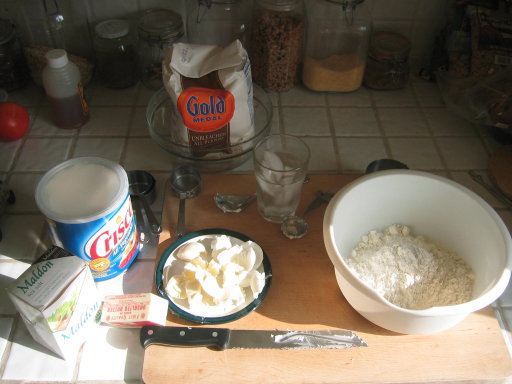
I’ve got a little over 2 1/4 cups of any reasonable all-purpose flour, 1/2 a teaspoon of salt, 6 tablespoons of butter, and 6 tablespoons of lard (vegetable shortening). On the side, have ready a glass of cold water…perhaps putting some ice into it if your kitchen is warm.
Mix the salt into the flour in a large bowl. Next, cut the butter and lard into little bits (say about the size of a small coin) putting the results into the flour. Handle everything as little and as quickly as possible as you do this, to stop them from melting. Use a couple of knives to cut them further into the flour.
 How to do this right? Practice gets the technique right, but you should be essentially repeatedly dragging the knife blades past each other, getting the ingredients trapped between them -cutting them into the flour more and more.
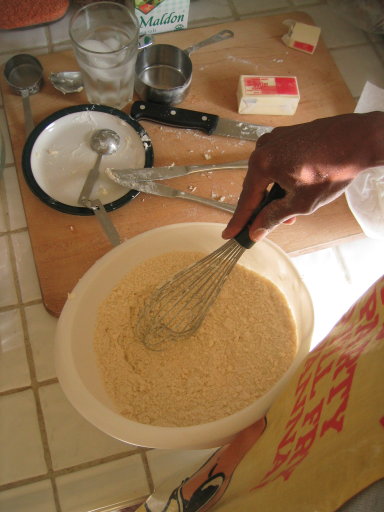
The same technique can be continued to make the whole setup turn into the consistency of breadcrumbs, but I’ve a way I prefer. Use an egg-whisk at this stage. Don’t start with this first though -do the thing with the knives for a little bit first… or you’ll just get sticky fat all stuck into it everywhere. Just practice. It is trivial after the first time you’ve done it. Don’t be tempted to resort to a machine to do this. You’ll miss the pleasure of doing these things with your own hands.
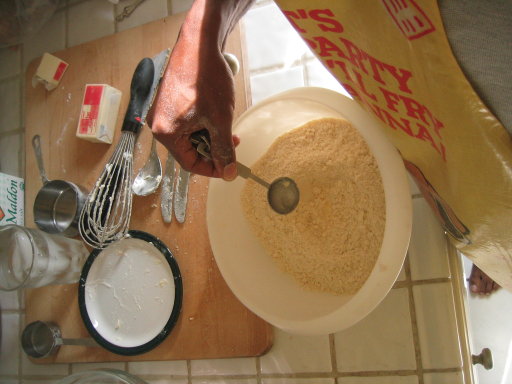 Into your bread-crumb-like mixture, sprinkle in a few tablespoons full of the iced water. Mix it in with a fork. Sprinkle again. Mix, and the get in there with your hands and it should be just (just) moist enough to compress the whole thing into a couple of balls of dough, roughly the same size each.
That’s it:
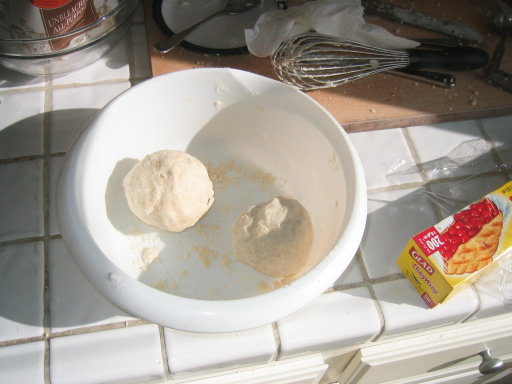
Wrap them in cling film and put them into the fridge for a bit.
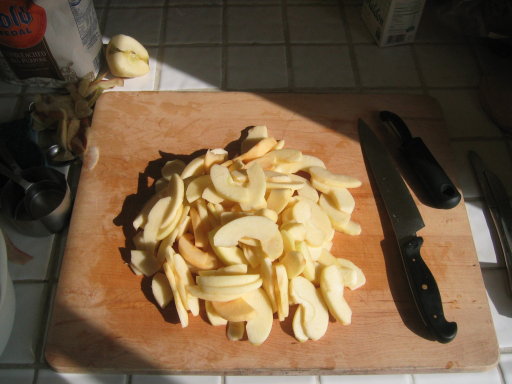
 Get your apples. 6 or 7 medium sized ones. Use any firm-fleshed ones you like. Some people like to mix sweeter ones like Gala variety with less sweet ones like Granny Smiths. That day, I used all Gala. Peel your apples. Quarter them and remove the cores. None of this is realy challenging, so no details are given here. Cut them into smaller segments. Sixteeths, I suppose (each quarter sliced into four slices). You’ll have a tasty pile of apple. Do not be tempted to eat (m)any.

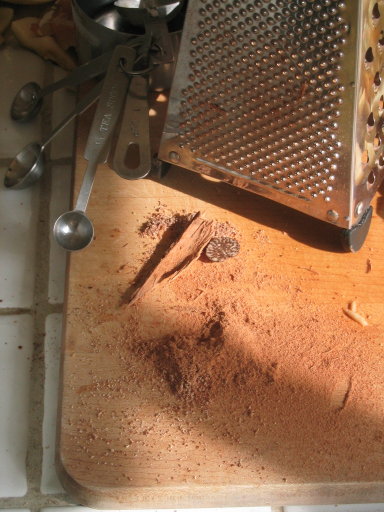 Grate some real nutmeg and cinnamon. You’ll want a generous teaspoon of cinnamon, and a stingy one of nutmeg. If you have any ground cinnamon or nutmeg in your cupboards… throw them out now. Why people have that stuff I do not know. It loses its flavour rapidly, and why would you need that when you can just grate it freshly when you need it?
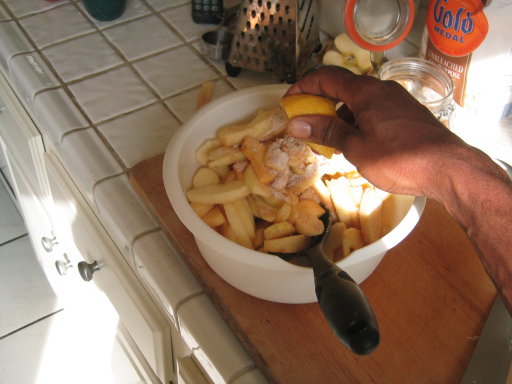
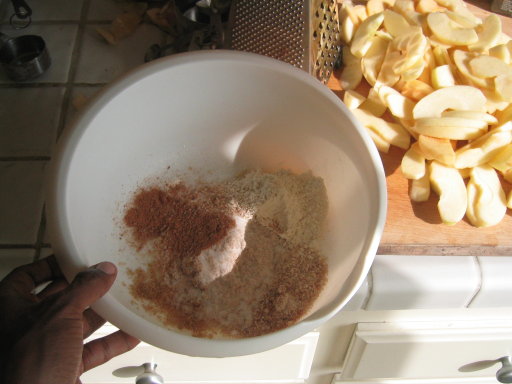 Get a cup of sugar (or less if your apples are very sweet), three tablespoons of flour, and a tablespoon full of lemon juice, and a tiny pinch of salt. Combine the apples with all of this stuff in a bowl, mixing it all together, putting the lemon juice in last. The temptation to eat apple pieces will be even more huge now. Resist.
Preheat the oven to 425 degrees F. I’m reminding myself of number and proportions from any good basic recipe book by the way. I don’t do this every week, so do not remember everything. There is no shame in looking it up. For lots of very workable simple basic recipes such as these sorts of pies, there’snot much to it once you know what you’re doing. I recommend -for baseline reminders from which you can then improvise to your heart’s content- Jim Fobel’s Old Fashioned Baking Book. It is just wonderful and simple, but with lots of solid ideas that work.
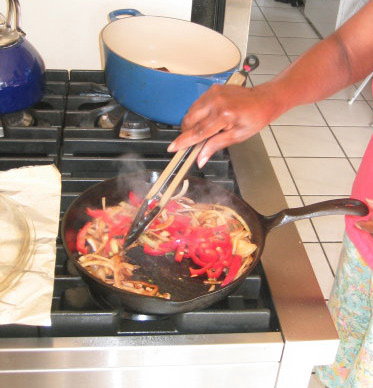 Ok, time to get ready to assemble it all now. Chase away anyone who is in the kitchen, especially if you do not want distractions, or be bumped into when lifting pastry and moving it from surface to dish. (Dish? You should have a good nine-inch pie dish to hand.) A great master was in my kitchen at this time, preparing another dish to be taken to the friend’s place for dinner. That great master is my mum, who was visiting at that time. Or perhaps I should say “mom”, American-style – just so I can have “mom and apple pie” in the same blog post. I’ve no idea how she does a fraction of the things that she does, but the results are always so tasty. She was doing something magical with pork. I did not have time to watch and learn, since I was on pie detail. Sigh.
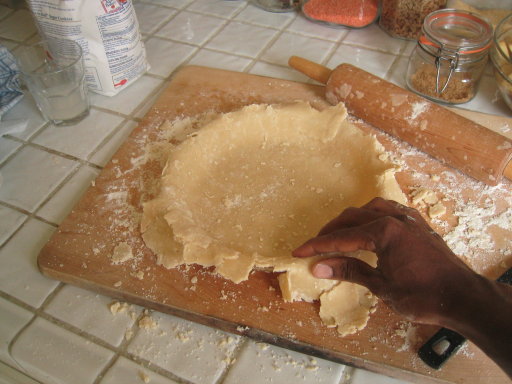
Get the pastry balls out of the fridge. Roll out one of them. Huh. This sounds easy. It is not if you have no experience doing this, so please be prepared for a bit of frustration.
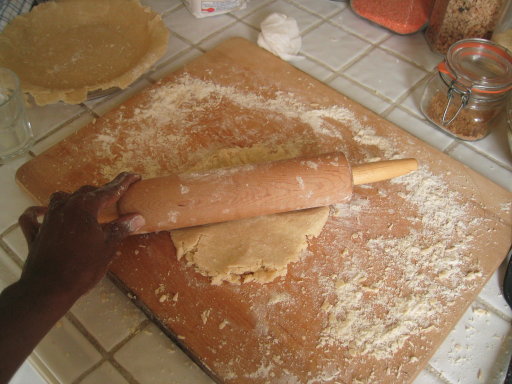
Some tips: (a) Make sure to sprinkle flour on the surface that you are working on, or your rolled pastry will stick to the surface. (b) The thing will keep breaking. That’s ok. You just take a tiny bit of water to use as glue to repair the breaks. (c) It is possible that your balls were a bit too dry overall… you’ll know this if your attempt to roll it out results in a dry crumbly foury mess… don’t be shy to sprinkle in a tiny bit of water, remold, and then roll out again. Don’t do this more than about once. don’t be tempted to start out with a lot more water in the first place, or a lot more fat. That way lies the greasy, heavy pastry that you see so often. This way will result in a delightfully delicate flaky pastry.
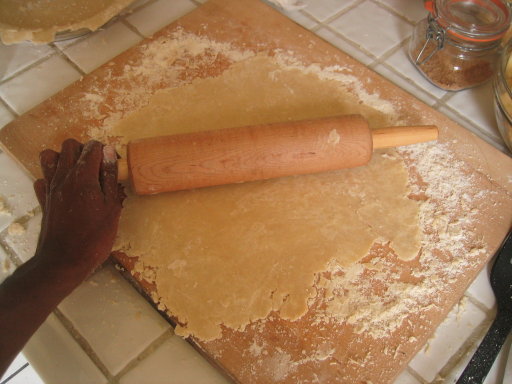
Get the pastry off the surface and shape it onto your (nine inch) pie dish. Leave at least an inch flapping loose around the edge. Easier said than done if you’ve not done this before. Practice. Don’t get reduced to tears as the thing keeps breaking. Just be gentle and patient. Glue bits that break off beack on with a tot of water and a squeeze. Nobody will ever know. This is such fun, actually.
Pop the applely mixture from before into the dish.

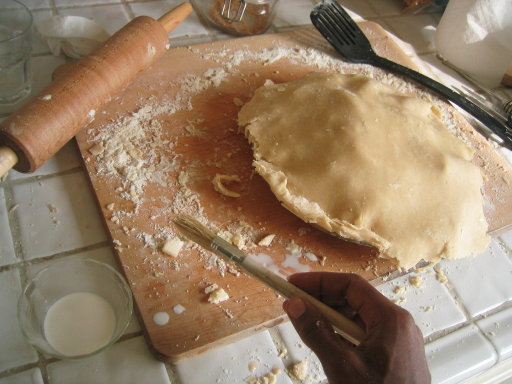
Snip some bits of butter into tiny pearls and dot a few of them here and there on the surface. Get the next pastry ball. Combine it with the unused bits from the previous ball. This is for the top of the pie. Roll it out as before, and put it onto the top. Use a little milk to moisten the edges of the bottom layer, and then squeeze the layers together at the edges to close up the pie. Fold over for a good seal, and decorate the edge as you see fit. I usually crimp with a fork:
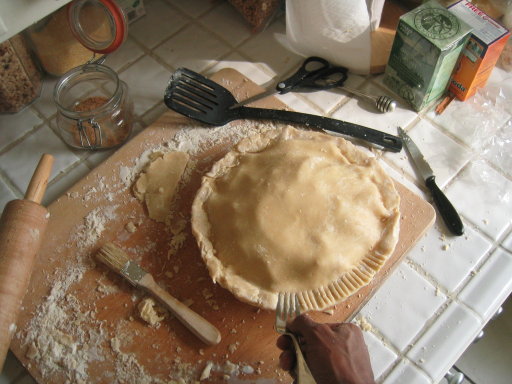
If you really want to overachieve a bit, use the unused bits of pastry to make shapes you can use to decorate the surface of the pie with. Leaves, apples, flowers, animals, equations, whatever. Glue them on by just moistening with a bit of milk and popping them on. Cut three big slits into the top of the pie. This will prevent the thing bursting with joy in the oven, and allow a lot of moisture to boil off.

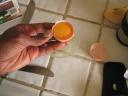 Separate an egg from its yolk, keeping the yolk. Stir with a teaspoon full of water. Get a pastry brush and brush the entire pie (but not the edges) with this glazing mixture. Sprinkle the pie with a light coating of sugar.


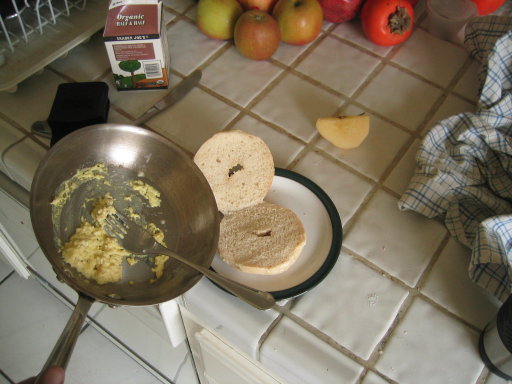 (You’ll have some egg stuff left over. And a bit of butter from the previous dotting of the pie. Don’t throw them away. Pop in a tiny amount of milk, salt, black pepper and… scramble them quickly and pop them onto a bagel (I get mine from Brooklyn bagel). Eat. This has nothing to do with the pie, but is a reward for not eating up the apples.)
Put the pie into the oven for about 20 minutes at the higher 450 degree heat. Turn it down to 350 and keep an eye on it for another half an hour at most (I would say). The result (a little browner in some places that I would have liked… I was rushing it with a bit of higher heat since we were late for going over to dinner – it was evened out and completed later on when re-heated directly before serving):
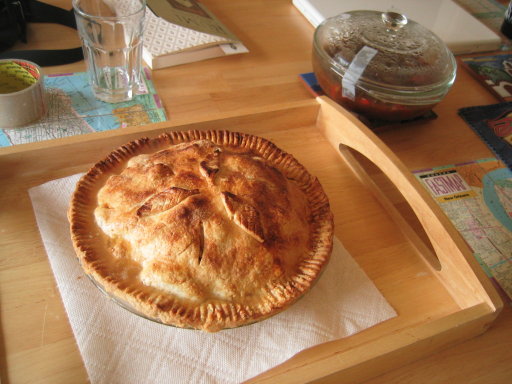
Serve as you like. Enjoy.
-cvj

Pingback: Sweet Preparations « Asymptotia
Pingback: A Humble Pie at Asymptotia
I’ve tried many different apple pie recipes over the years and I must say that I was a bit skeptical about this one at first. I was surprised that when i first bit into it, that my taste buds went crazy. I was truly amazed on the results of this one. it’s been added to my personal cook book. Thanks for sharing 🙂
Nope. No, No, and No.
(1) Your suggestion about adding more water is a recipe for an over heavy or hard crust. I deliberately use just enough to hold it together to ensure a nice flaky crust when baked up.
(2) I’m very happy with my standard roller, and rolling technique, thanks. If your methods work for you, great… mine works for me.
(3) Finally if you actually read the description in the post (and not just look at the pictures), you’ll find that I do use 1/2+1/2 in my fat mixture.
(4) I use unsalted butter for all of my baking.
Happy baking.
-cvj
First, I recommend half Crisco and half butter for the most tasty crust. Cut the salt back a bit if you’re using salted butter.
Second, you need to use a bit more water, your dough is breaking up too much.
Third, try rolling it out between two sheets of wax paper. Peel off the top sheet and use the remaining sheet to transfer the crust to the pie pan. The alternative is a pastry cloth and roller sleeve, but they are hard to keep clean if you don’t make a lot of pies.
Fourth, try an Italian roller: tapered on both ends, no roller bearing. It takes a little skill to use, but it helps you to not get the edges of the crust too thin.
Finally, real lard acutally makes great pie crust. Try it sometime (half butter). You will be surprised!
Pingback: Bench - Asymptotia
Pingback: Have One for Michael Jackson - Asymptotia
Hey Jeff! Thanks! (Long time since I’ve heard from you. I hope all’s well.)
-cvj
all I have to say is that I have eaten Clifford’s apple pie, and it’s f$@#%@#$ing AWESOME.
janet:- I will try to roll out more pastry posts in the future*.
-cvj
(*Yes, I know it’s obvious that I wrote this comment more for the pun than any other reason. I’m easily amused…)
Yummmmmmmmmmmmmmmmmmmmmm! I’m going to have to try that sometime! BTW, I’m with Janet — when I saw “lard” and “vegetable shortening” in the same sentence, my first thought was, when did pigs become vegetables?! Maybe the strict distinction between “shortening” and “lard” is a cultural one — for Muslims, Jews, and vegetarians, it makes a big difference. 🙂
Well, now you know that the way to get me to come out of the woodwork is to blog about pastry!
In order to make an apple pie from scratch, you must first create the universe.
– Carl Sagan, Cosmos
It’s so funny — I made pastry for the first time two days ago when I ran out of Sainsbury’s shortcrust (don’t laugh, I’ve always been intimidated). I took out my trusty Mama Dip cookbook and roughly followed her recipe and it actually turned out really well. Can’t go wrong when Mama Dip is in the kitchen! I mashed the fat into the flour with a fork, like I usually do when making buttermilk biscuits anyway.
I have a sack of apples that need using up. I’ll be making a pie with them, with inspiration from this post. Thanks!
Mmmmmm! I wish that it was possible to smell stuff on the internet. However the photos provided a feast in themselves. I’m having a bit of a pastry crisis in the run up to Chistmas, so I will give your tips a try. The iced water sounds like a very good idea. Love the phase diagram! I have a large apple tree in the garden, so a good recipe for apple pie is most welcome.
Thanks all!
Kristin:- That is interesting, and I will try it some time.
Janet – Good to hear from you after so long. Yes, “vegetable shortening” would strictly be the best terminology (I would not use the word “Crisco” for the same reason that I don’t use “Kleenex” for tissue, etc), but I did the digression on lard since I know several people who still would go “ugh! lard” at the sight of vegetable shortening. Yes, that rolling technique idea is excellent.
spyder: – I’m guessing onions and red peppers, at least.
LL:- Why, that’s just cheating! 🙂
Plato:- My mum does not really do apple pies. I do. And I’ll throw down with your mom any time! And don’t get me started on cherry pies….
My mum’s chief baking prowess is in cakes. If her cakes were more widely known, they would sing songs in celebration of her cakes over 1000 years from now.
Best,
-cvj
Ah momma’s boy.
My Mom could probably bake apple pies better then your mom? 🙂
Right consistancy, yummy crust.
That pie is a work of art.
A very non-traditional trick for rolling out very thin crusts without breaking them is to briefly microwave the crust when it is about 1 cm thick.
Yum.
I wouldn’t call that “lard,” I’d call it “vegetable shortening” or “Crisco.” To me, “lard” means pig fat.
One of the best pieces of advice I’ve ever gotten about rolling out crust is that you should start at the center of the dough ball and roll forward; then turn the dough a quarter turn and repeat, flouring the board as necessary. Turning the dough after each stroke of the rolling pin ensures that if the dough is starting to stick to the board, you know right away — thus avoiding the aggravation of getting your circle perfect and only then discovering that it’s glued to the board.
Anyway, yum.
I don’t have much time for baking these days, but I did make lemon curd yesterday. Our Meyer lemon tree was loaded with fruit, and I had to do something with it. A few weeks ago I harvested enough lemons to yield 11 cups of juice, and I used most of it to make frozen lemonade for next summer. I think a lot of my friends are going to be getting lemon curd and/or candied lemon peels as gifts this year.
My personal favorite kitchen chemistry is candy making. Most of the phase changes are of the reversible sort, so one can reheat, rehydrate, and try again. An example of a non reversible candy is divinity.
The crust, the crust, it looks absolutely delicious. The crispy, melt-in-your-mouth textural warm experience contrasting with the vanilla ice cream is a vision to die for. Okay not die, but at least come a begging. Thanks for the visual cues to go with the full preparation instructions and relation to all dimensions of the phase diagram.
ps: what is in the pan with the pork that your mother is saute’ing???
Great recipe, but I’ve a couple of additional suggestions about the crust. I swear by the technique described in detail in the last chapter of Jeffrey Steingarten’s thorough and whimsical food writing collection The Man Who Ate Everything.
Steingarten points out that the key to getting an optimally flaky crust is actually to have a distribution of sizes in the shortening/flour mixture ranging from, yes, breadcrumb to the size of small olives. It’s the presence of these larger clusters that will lead to air pockets that help create the flakiness that one wants in a crust. (He explains in decent detail the various roles of gluten and fat in making a crust that won’t crumble yet won’t be unrelentingly tough, either.)
And the Steingarten technique involves mixing with your fingers, too! With the technique he describes, keeping the ingredients cool doesn’t matter. (You do add ice water after the initial mixing stage and then stir it in with a fork, but that doesn’t last too long, and before long you’re back in with your hands forming the balls for the two crusts.) I like this because I find with knives or a pastry cutter that I’m spending a lot of time scraping dough to go back into the bowl.
Yummmmmmmmmmmmmm. *Insert hungry-student-ness here*.
–IP